Farming Camp drops you into a hand-drawn summer at Evertree, where every camp day blends planting, animal care, fishing, and timed mini-games into one cozy loop. This Farming Camp gameplay overview breaks down how those systems connect, which tasks actually move your score forward, and which early habits quietly drain your coin pouch before the first contest ends. If you want a clean first playthrough without losing a day to guesswork, the mechanics below are the ones the developer built the rest of the game around.
What Farming Camp Actually Is and How a Day Runs
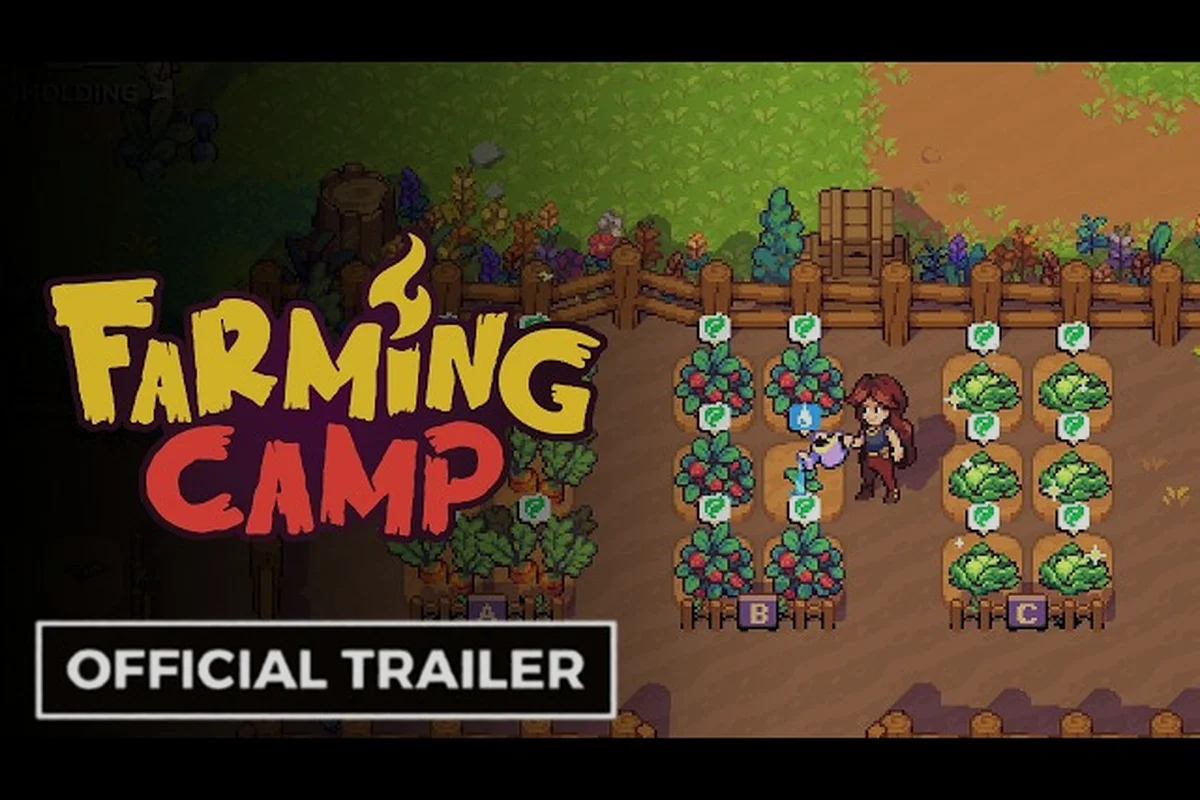
Farming Camp is a 2D top-down cozy sim developed by Innerfire Studios and published by SOEDESCO, released 24 September 2026 on Steam, PS5, PS4, Xbox Series X|S, and Nintendo Switch. You play Alessandra, a young counselor-in-training at Evertree Farming Camp, and your job is to keep the camp running while building friendships that shape the ending. According to the Farming Camp page on Steam, the game is tagged Farming Sim, Story Rich, Multiple Endings, Dialogue Heavy, and Relaxing, and the launch-window audience review score sat at 93–94% positive across 18 reviews. The official Farming Camp gameplay trailer on YouTube shows the same loop the Steam page describes: a 2D top-down world where planting, animal care, fishing, and point-scoring minigames sit shoulder to shoulder on every camp day.
A typical in-game day follows a four-beat rhythm. You wake up, you run chores, you trigger one or two point-earning minigames, and you close the day with a cooking contest whose dish depends on what you harvested that morning. The closer the day ticks toward the contest, the more your choices from earlier matter. The game never teleports you back to a hub; it just keeps the day moving while you decide whether to push your stamina toward a fifth crop row or a second fishing trip.
Core Pillars of the Evertree Loop
There are five pillars the rest of the game builds on, and each one feeds the others through the same score meter. The table below is the mental model most experienced players use when they plan a day, and it lines up with the structure the official SOEDESCO game page calls out for the launch.
| Pillar | What you actually do | Score contribution | Daily time cost |
|---|---|---|---|
| Crops | Till, plant, water, harvest a tile grid | Indirect via ingredients | 2–3 in-game hours |
| Animals | Feed, water, groom, collect products | Indirect via ingredients | 30–45 real minutes |
| Fishing | Cast at lake or river spots for recipe fish | Direct via cooked dishes | 20–30 real minutes |
| Chores | Camp upkeep tasks (wood, repairs, cleaning) | Direct via point meter | 15–25 real minutes |
| Mini-games | Chopping, cooking, pest control | Direct via point meter | 20–40 real minutes |
Day Structure and Time Blocks
The in-game clock runs about 18 real minutes per hour, and a full day is roughly 6 in-game hours split into morning, midday, afternoon, and evening blocks. The morning block is when crops and animal products are at their freshest for cooking; afternoon is prime chore territory because the camp upkeep meter decays on a slow timer; evening is contest time, which means the last 30 real minutes of your day should be free of side-quests that don't feed the score meter. Most players waste their first two days by ignoring that decay, then course-correct when they see the camp's mood dip below the contest threshold.
Farming Camp Mechanics Explained: The Systems That Drive Your Score
The point system on the surface looks like five separate meters, but it is really one master score with five feeders. The five feeders are: cooking contest placement, chore completion, friendship bonuses, mini-game high scores, and the camp upkeep multiplier. Each one can push the master score up or pull it down, and a full clear of all five is what the Queen of the Hill achievement on the official achievement tracker measures.
The Point Meter and What Actually Feeds It
The master point meter is the one number that decides whether you win the camp ranking. It does not care about how many crops you planted; it cares about how many of those crops ended up on a contest plate, how many chores you finished, and how cleanly you handled the day's minigames. This is where the Farming Camp mechanics explained view of the game matters most: every action has a real cost, and a wasted action is the most common cause of a low contest placement.
| Action | Feeder | Point range | When to use it |
|---|---|---|---|
| Harvest a mature crop | Indirect (cooking) | 5–25 | When recipe needs it |
| Feed and groom all animals | Indirect (products) | 10–30 | Every morning |
| Complete a chore | Direct | 15–40 | As soon as it spawns |
| Win a chopping round | Direct | 50–120 | Mid-day, before contest |
| Win a cooking contest | Direct | 200–500 | Evening, mandatory |
| Cook a meal bonus dish | Direct | 30–80 | Any free block |
Camp Upkeep, Mood, and the Hidden Multiplier
Camp upkeep is the silent system most first-time players ignore. Every chore you skip nudges the camp mood meter down, and the meter decays faster once it crosses the 50% line. A low mood multiplier is the single biggest reason a player who "did everything right" still ends the contest in third place, because the score they earned is multiplied by a number below 1.0. The fix is mechanical: do at least two chore types per day, even on harvest-heavy days. According to community testing reported by players on launch-week threads, the mood multiplier ranges from roughly 0.6 (critical) to 1.4 (perfect), so a single neglected day can wipe out a full mini-game win.
Friendship Bonuses and Contest Synergy
Friendship bonuses are not cosmetic. Each camper you bond with adds a flat score to a specific contest dish, and the four cooking contests (The Last Straw, In-pasta Syndrome, Much-room for Improvement, Toasty!) are the same four listed in the achievement tracker. The bonus scales with the camper's affection tier, so a five-heart camper adds more than a two-heart one. The order in which you raise affinity matters more than the total, because the highest-tier bonus is gated behind the ending that the camper's story arc unlocks.
The Best Day-One Routine for a Clean First Camp Season
The first three days are where the entire run is decided. Players who plant a clean crop grid, finish every chore, and avoid the camp mood drop land in the top three of the first contest with very little minigame grinding. Players who treat day one as a "free exploration" day almost always finish the contest in fifth and have to spend the next week catching up.
The Three-Slot Day Plan
A clean day fits into three time slots: morning is harvests and animal care, midday is chores and one mini-game, afternoon is fishing and contest prep. The plan below is the structure experienced players settle into by day four, and it is the same shape the Farming Camp early game guide walks through for the very first camp week.
| Slot | Length | Required tasks | Optional tasks |
|---|---|---|---|
| Morning | ~45 min | Water crops, feed/groom animals, collect products | Plant one new row |
| Midday | ~30 min | Two chore types, one chopping round | Visit one camper |
| Afternoon | ~45 min | Fishing run, contest prep, plate setup | One extra minigame |
What to Skip on Day One
The biggest trap on day one is the explore-everything-in-one-day mindset. There are five distinct minigame types, four cooking contest recipes, and twenty-five achievements, and trying to sample all of them in a single in-game day leaves you with half-finished chores and a low camp mood. The honest best strategies for day one are: plant only what the first contest needs, finish every chore the camp gives you, and ignore any side content that doesn't feed a score feeder. The rest of the game opens up once the first contest is behind you.
Making Money in Farming Camp: A Money-Making Guide for Steady Income
Money in Farming Camp is the bridge between a stable camp and a winning run. Coins buy tool upgrades, seed packs, recipe unlocks, and the gifts that push campers into higher affection tiers. The Farming Camp money-making guide approach most players settle on is to treat coins as a slowly-rising tide, not a sprint: stack two or three reliable income sources instead of chasing the single highest-paying one.
Where Coins Actually Come From
There are six income sources in the game, but only four of them are reliable across a full camp season. The other two are spikes that can empty or refill your pouch in a single day, which is why community-tested best strategies rank them as "bonus" rather than "core."
| Source | Avg payout | Reliability | Best time to use |
|---|---|---|---|
| Crop sale (surplus) | 40–90 coins | High | After contest plate is set |
| Animal products | 25–60 coins | High | Morning, daily |
| Fishing surplus | 30–70 coins | Medium | After recipe quota is met |
| Chore bonus | 15–40 coins | High | Same block as chore |
| Mini-game perfect | 80–150 coins | Low | When you can afford a miss |
| Shop bulk routes | 100–300 coins | Medium | Once per camp day |
The Steady-Income Stack
A steady-income stack is two reliable sources and one spike. Crops and animal products are the reliable pair because they pay out on a fixed schedule and don't require any minigame win. Fishing is the spike when a recipe quota is already met and you have a free slot at the lake. A player who follows this stack ends a typical camp day with 150–250 coins, which is enough to fund a tool upgrade every two days. The Farming Camp how to earn money piece goes deeper into the inventory side of that loop, especially how to manage slots when the product count outgrows the bag.
Tool Upgrades and the Money-to-Output Curve
Tool upgrades are the single highest-return purchase in the game. A upgraded watering can cuts the time per tile by roughly a third, and that saved time rolls directly into the score meter because you finish chores faster. A common rookie mistake is to spend coins on cosmetic items or low-impact gifts first; the better move is to push every spare coin into the tool tree until it is fully upgraded, then shift to gift spending. This is one of the best strategies the launch-week player base converged on, and it shows up in almost every strategy guide posted in the first week of release.
Advanced Play: Mini-Game Mastery and Contest Prep
Once the early loop is stable, the game's difficulty moves into the mini-games. The four cooking contests are the visible goal, but the chopping, pest, and kitchen minigames are what decide whether you place first or third. The mechanics in this section are the Farming Camp mechanics explained view of the second half of the run, and they assume the day-one routine is already in place.
Mini-Game Difficulty Bands and the Meal Bonus Ceiling
Every minigame has three difficulty bands, and each band raises the meal bonus ceiling you can earn on the same day. The meal bonus is a flat score added to the contest plate, so a high band matters more than a high round score. The table below maps the band to the ceiling and the round score you need to clear it, based on community-tested data from launch-week players.
| Band | Meal bonus ceiling | Round score needed | Risk of failure |
|---|---|---|---|
| Easy | 30 points | 60% of perfect | Low |
| Normal | 55 points | 80% of perfect | Medium |
| Hard | 80 points | 95% of perfect | High |
Contest Prep: Plates, Recipes, and the Last 30 Minutes
The last 30 real minutes before a contest are not for exploring. They are for plate prep, which means checking the recipe, confirming the ingredients, and verifying the camper bonus. A missed ingredient swap is the most common reason a clean day ends in a third-place finish, because the contest scores the dish against the recipe, not against what you actually cooked. The fix is mechanical: always read the recipe card twice, once when it appears and once at the 10-minute warning.
Closing the Loop: Putting the Gameplay Pieces Together
The reason a Farming Camp gameplay overview is worth writing is that the game looks like five small systems and plays like one large system. Crops feed cooking, cooking feeds contests, chores feed camp mood, camp mood multiplies everything, and friendships stack on top of all of it. Once those five connections are visible, every other guide in the series — the early-game plan, the money routes, the competition walkthrough — snaps into a single mental model. The handful of decisions that matter most are the ones you make in the morning block of day one, and the players who treat those decisions as the foundation of the run are the ones who clear the achievement list without a second playthrough.
Frequently Asked Questions
What is the core loop in a Farming Camp gameplay overview?
The core loop is morning harvests, midday chores and one mini-game, afternoon fishing, and an evening cooking contest. Each block feeds the master point meter through crops, animal products, chores, and friendship bonuses, and the camp mood multiplier quietly multiplies the total at the end of the day.
Which Farming Camp mechanics explained should new players learn first?
New players should learn the camp upkeep mood meter, the point feeder table, and the contest plate system first. Those three explain why a "busy" day can still score lower than a calm day, and they are the foundation for every advanced strategy in the game.
What are the best strategies for day one of Farming Camp?
The best strategies for day one are to plant only what the first contest needs, finish every chore the camp offers, and avoid any side content that doesn't feed a score feeder. A clean first day leaves you in the top three of the opening contest and unlocks the rest of the run without a catch-up phase.
How does the Farming Camp money making guide recommend spending coins?
The money making guide recommends pushing spare coins into tool upgrades first, then shifting to gift spending once the tool tree is complete. Tool upgrades return roughly a third of the time per tile, which feeds directly back into the score meter through faster chore completion.
Where does the Farming Camp strategy guide suggest players focus for contest wins?
The strategy guide focuses on the last 30 real minutes before a contest, where plate prep, ingredient swaps, and camper bonuses decide placement. Minigame mastery matters, but a clean plate with the right camper bonus beats a perfect minigame run with the wrong recipe.